In the world of hairstyling, the Dutch braid has emerged as a beloved and versatile technique. Whether you’re a fan of elegant updos or casual, everyday looks, Dutch braids can be your go-to choice. This comprehensive guide will take you through everything you need to know about Dutch braid hairstyles. From basic tutorials to intricate styles, we’ve got you covered. Discover how to braid your hair like a pro, explore the prettiest Dutch braid hairstyles, and unlock the secrets to mastering this art. Join us on this exciting journey to elevate your hairstyling game!
What is a Dutch Braid?
What sets a Dutch braid apart from other braiding techniques?
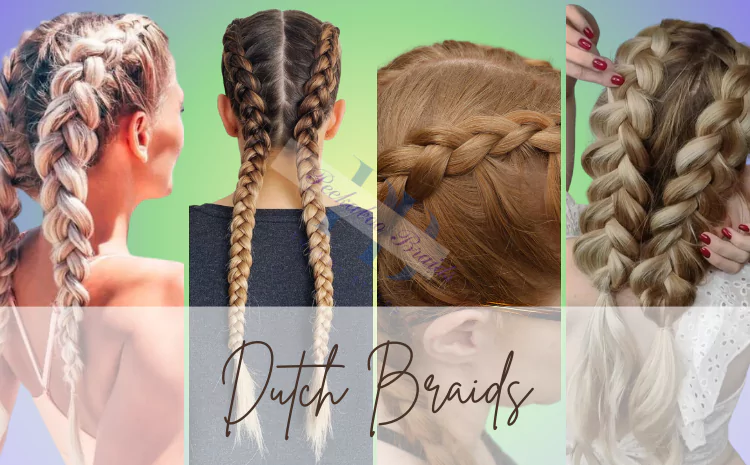
The Dutch braid, also known as an inverted or inside-out braid, is a distinctive half down braided hairstyle that differs from other braiding methods. What makes it unique is that instead of the braid sitting on top of the hair (as in the case of a French braid), the Dutch braid appears raised from the scalp. This inverted effect adds depth and texture to the braid, making it visually striking. Dutch braids are characterized by the appearance of the braid strands, which create a three-dimensional look.
How does it differ from a French braid?
A common point of confusion is distinguishing between Dutch and French braids. While two styles involve weaving three strands of hair together, the key difference lies in the direction of braiding. In a French braid, the strands are crossed over the middle section, resulting in the braid lying flat against the head. In contrast, Dutch braiding involves crossing the strands under the middle section, creating the raised effect. Understanding this distinction is crucial for mastering Dutch braid techniques.
Is it suitable for all hair types and lengths?
One of the great features of the Dutch braid is its versatility. It can be adapted to suit various hair types and lengths. Whether you have long, short, straight, or curly hair, you can create stunning Dutch braid hairstyles. Additionally, Dutch bubble braids work for different occasions, from casual everyday looks to formal events. However, certain hair textures may require specific techniques or products to achieve the desired results. In the following sections, we’ll explore Dutch braid tutorials tailored to different hair types and lengths.
Getting Started: The Basic Dutch Braid Tutorial
Step-by-step instructions for beginners
If you’re new to Dutch braiding, don’t worry; we’ve got you covered. Let’s start with the basics. To create a Dutch braid, you’ll need to divide your hair into sections, typically three. These sections will serve as the foundation for your braid. Here’s a simplified step-by-step guide:
- Begin by brushing your hair to remove any tangles.
- Choose where you want to start your Dutch braid. You can begin at the crown of your head, near your forehead, or even at the nape of your neck, depending on the desired look.
- Divide your chosen section of hair into three equal strands.
Tips for sectioning your hair effectively
The key to a neat and well-defined Dutch braid is precise sectioning. Here are some tips to help you divide your hair effectively:
- Use a rattail comb: A rattail comb with a pointed end is a handy tool for sectioning your hair accurately.
- Divide hair evenly: Ensure that the three strands you create are of equal thickness to maintain consistency in your braid.
- Secure the remaining hair: If you’re only braiding a portion of your hair, use hair ties or clips to keep the rest out of the way.
Common mistakes to avoid during the process
Dutch braiding may seem intimidating at first, but with practice and awareness of common mistakes, you can avoid potential pitfalls. Some mistakes to watch out for include:
- Uneven tension: Maintain consistent tension on each strand to prevent lumps or gaps in your braid.
- Neglecting to add hair: Dutch braids involve gradually adding small sections of hair as you braid. Forgetting to do this can result in an incomplete braid.
- Loose strands: Keep your braid tight and secure by ensuring all strands are incorporated properly.
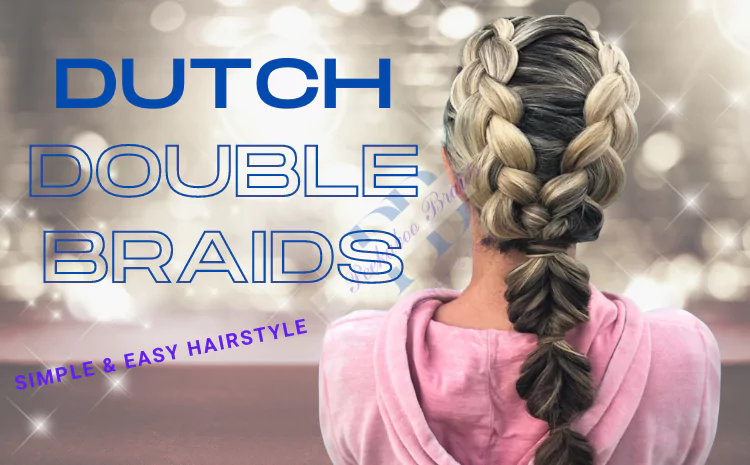
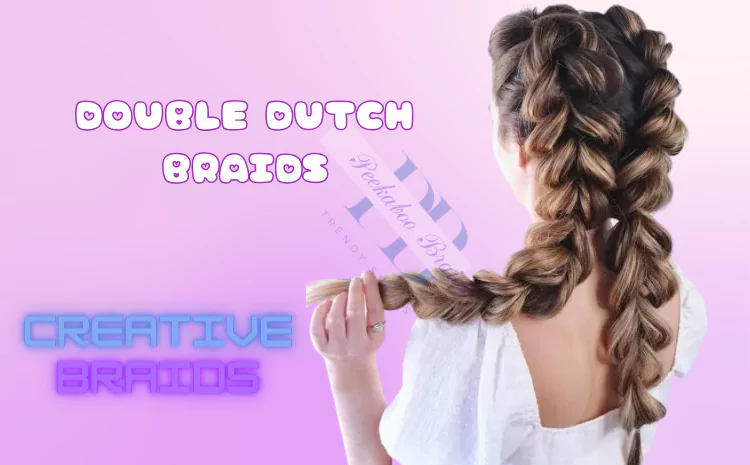
Double Dutch Braid: Twice the Elegance
How to create the stunning double Dutch braid hairstyle?
Once you’ve become comfortable with the basic Dutch braid, it’s time to level up your braiding game with the double Dutch braid. This style offers twice the elegance and visual impact, making it a favorite for special occasions or when you simply want to turn heads.
To create double Dutch braids:
- Begin with well-brushed hair to remove knots and tangles.
- Choose your starting point, often near the hairline or crown.
- Divide your hair into two equal sections, creating a part down the middle.
- On one side, start the Dutch braid by dividing the section into three strands.
- Follow the basic Dutch braid technique, crossing the strands under each other while incorporating small sections of hair.
- Continue braiding along the scalp until you reach the nape of your neck or desired endpoint.
- Secure the end of the braid with a hair tie or an elastic band.
- Repeat the process on the other side, creating a second Dutch braid that mirrors the first.
Ideal occasions to rock this look
The double Dutch braid is a versatile style that suits a range of occasions:
- Everyday Chic: Wear double Dutch braids casually for a stylish everyday look. They’re comfortable and keep your hair out of your face.
- Formal Events: This hairstyle can be dressed up for weddings, proms, or any formal event. Consider embellishing the braids with hairpins or accessories for added glamour.
- Athletic Activities: Double Dutch braids are a popular choice for workouts and sports, as they keep hair secure and stylish during physical activities.
Maintenance and styling tips for a long-lasting hold
To ensure your double Dutch braids stay looking fresh throughout the day or night:
- Use Quality Hair Ties: Invest in good-quality, snag-free hair ties to secure the ends of your braids. This prevents damage to your hair.
- Apply Hair Spray: A light mist of hairspray can help set your braids in place and reduce flyaways.
- Regular Touch-ups: Depending on your hair type, you may need to periodically adjust and re-braid small sections that loosen over time.
Double Dutch braids are a captivating style that combines elegance and practicality. With a bit of practice, you’ll be able to achieve this stunning look for various occasions.
Exploring Dutch Braid Hairstyles for Long Hair
A showcase of elegant and intricate styles
Long hair opens up a world of possibilities when it comes to Dutch braid hairstyles. Whether you’re headed to a formal event, a casual outing, or simply want to elevate your everyday look, there’s a Dutch braid style to suit your long locks.
Here are some Dutch braid your hair styles for long hair:
- Romantic Fishtail Dutch Braid: Combine the charm of a Dutch braid with the intricate beauty of a fishtail braid. This style is perfect for date nights or weddings.
- Bohemian Dutch Braid Crown: Create a crown-like effect by encircling your head with a Dutch braid. Ideal for music festivals or a carefree day out.
- Waterfall Dutch Braid: Add a touch of magic to your long hair with a cascading waterfall Dutch braid. It’s a dreamy and ethereal look suitable for photo shoots and special occasions.
How to add variety to your long hair Dutch braid looks?
Long hair offers the advantage of experimenting with various Dutch braid styles. To add variety:
- Incorporate Accessories: Decorate your braids with hairpins, flowers, or ribbons for a unique touch.
- Mix and Match: Combine Dutch braids with other braiding techniques like fishtail or rope braids to create intricate and customized looks.
- Braid Placement: Experiment with different starting points for your Dutch braids, such as the side, center, or even diagonally for a fresh take on the style.
Secrets for keeping long hair healthy and manageable
Maintaining long hair is essential to ensure it looks its best in Dutch braid hairstyles. Here are some tips for healthy and manageable long locks:
- Regular Trims: Trim your hair every few months to prevent split ends and maintain a neat appearance.
- Hydration: Keep your hair hydrated by using a quality conditioner and deep conditioning treatments as needed.
- Gentle Detangling: Use a wide-tooth comb or a detangling brush to avoid hair breakage when detangling your long locks.
Dutch braid hairstyles for long hair are not only visually stunning but also a testament to your dedication to maintaining healthy, beautiful locks. Explore different styles, and don’t hesitate to get creative with your braids!
Short Hair and Dutch Braids: Yes, It’s Possible!
Adapting Dutch braids for shorter hair lengths
While Dutch braids are often associated with long hair, they can also be adapted beautifully for shorter hair lengths. Short hair opens up exciting opportunities to create unique and eye-catching Dutch braid styles. Here’s how to make Dutch braids work for your shorter locks:
- Mini Dutch Braids: For very short hair, consider creating mini dutch braids on each side. These smaller braids can be strategically placed around your head, adding a touch of flair to your look.
- Side-Swept Dutch Braid: A side-swept Dutch braid can be a chic and modern choice for short hair. Starting the braid at one temple and sweeping it across to the other side adds a dynamic element to your hairstyle.
- Accessorize: Use hairpins, clips, or headbands to accessorize your short hair Dutch braid and create a playful or elegant look.
Unique short hair Dutch braid styles to try
Short hair Dutch braid styles offer endless possibilities. Here are a few ideas to inspire your creativity:
- Mohawk Dutch Braid: Channel your inner rocker with a Mohawk-inspired Dutch braid. Braid a narrow section from the front to the back, leaving the sides loose or styled in a unique way.
- Short Bob with Dutch Braids: If you have a bob haircut, add a touch of boho-chic with Dutch braids framing your face. These braids can be styled to blend seamlessly with your bob.
- Dutch Braid Pixie: Yes, even pixie cuts can embrace Dutch braids. Create small, delicate settle for two dutch braids along the sides or at the front to add character to your pixie style.
Products and accessories to enhance your short hair look
Short hair often requires specific products and accessories to achieve and maintain Dutch braid styles:
- Texturizing Spray: To add grip and texture to your short hair, consider using a texturizing spray before braiding. This helps prevent slippage and keeps your braids in place.
- Bobby Pins: Bobby pins are handy for securing shorter strands that may not reach the end of the braid. They can also be used decoratively to hold the braids in place.
- Hair Clips: Use hair clips to section off your hair and keep it organized while braiding. They also come in handy for holding hair in place during the braiding process.
Short hair is no longer a barrier to experimenting with Dutch braids. With the right techniques and a touch of creativity, you can rock Dutch braid hairstyles that perfectly suit your shorter locks.
Beyond the Basics: Reverse Braid and More
What is a reverse Dutch braid, and how is it done?
The reverse Dutch braid, also known as an inside-out Dutch braid, offers a captivating twist on the traditional Dutch braid. Instead of the braid appearing raised from the scalp, as in a standard Dutch braid, the reverse Dutch braid creates an inverted, recessed effect. This unique look can be achieved by reversing the braiding direction. Here’s how to create a reverse Dutch braid:
- Start with well-brushed hair and choose your desired starting point.
- Divide the section of hair into three equal strands, just as you would for a standard Dutch braid.
- Begin the braid by crossing the right strand under the middle strand, and then cross the left strand under the middle strand.
- After completing the first two cross-unders, begin adding small sections of hair to the right and left strands before crossing them under the middle strand.
- Continue braiding in this reverse direction, incorporating hair as you go, until you reach the desired endpoint.
- Secure the end of the braid with a hair tie or elastic band.
The reverse Dutch braid is a captivating choice for those seeking a fresh take on the traditional Dutch braid. It’s particularly striking when combined with other braiding techniques or when used to create intricate patterns.
Combining Dutch braids with other hairstyles for a creative twist
Dutch braids can be combined with various other hairstyles to create stunning and unique looks. Here are some creative combinations to consider:
- Dutch Braid into a Bun: Begin with a Dutch braid and then transition it into a bun at the nape of your neck. This fusion of two classic styles offers elegance and practicality.
- Side Dutch Braid into a Ponytail: Braid your hair into a side Dutch braid and then gather the rest of your hair into a high or low ponytail. This contrast in styles adds interest and flair to your overall look.
- Half-Up, Half-Down Dutch Braids: Create two Dutch braids on the top section of your hair, leaving the rest down. This style is perfect for a trendy, casual appearance.
Expert insights into advanced Dutch braiding techniques
Mastering advanced Dutch braiding techniques requires practice and patience. Here are some expert insights to help you perfect your skills:
- Tension Control: Maintain even tension on each strand of hair to achieve a uniform and polished braid.
- Neat Sections: Clean and even sections of hair are crucial for a flawless Dutch braid. Use hair clips to keep sections separated and organized.
- Practice Regularly: The more you practice, the more confident and skilled you’ll become in Dutch braiding and its variations.
Advanced Dutch braid techniques offer endless possibilities for creativity and self-expression. As you become more comfortable with the basics, don’t hesitate to explore these advanced styles and make them your own.
Dutch Braid Pigtails: A Playful Classic
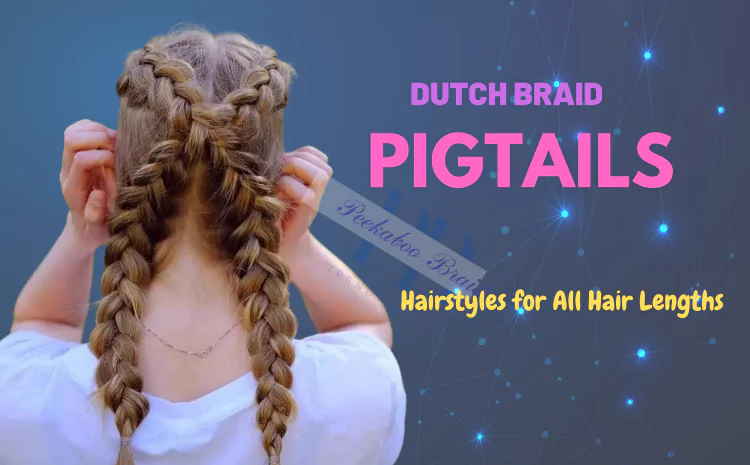
Step-by-step guide to achieving cute Pigtail Dutch braid
Dutch pigtails braid are a timeless hairstyle that exudes playful charm. Whether you’re feeling nostalgic for your childhood or simply want a fun and youthful look, this style is perfect. Follow these steps to create adorable dutch braiding tutorial:
- Begin with freshly washed and detangled hair.
- Part your hair down the middle, dividing it into two equal sections.
- Starting on one side, take a small section of hair near the hairline and divide it into three strands.
- Begin your Dutch braid by crossing the right strand under the middle strand, and then cross the left strand under the middle strand.
- Continue braiding, adding small sections of hair to each strand as you go.
- Braid along the scalp until you reach the nape of your neck.
- Secure the end of the braid with a hair tie or elastic band.
- Repeat the process on the other side to create the second Dutch braid pigtail.
How to accessorize and personalize your pigtails?
Dutch braid pigtails offer ample opportunities for personalization and accessorizing:
- Ribbons and Bows: Tie colorful ribbons or bows at the base of each braid for a whimsical touch.
- Hairpins and Clips: Use decorative hairpins, clips, or even small flowers to adorn your braids.
- Beads and Charms: Thread small beads or charms onto your braids for a boho-inspired look.
Pigtails for all ages: From schoolgirls to adults
While Dutch braid pigtails are often associated with childhood, they can be styled in a way that’s suitable for individuals of all ages. For schoolgirls, they offer a cute and easy-to-manage hairstyle. For adults, a more polished and embellished version can be worn to events, parties, or even as a casual and fun look.
Creating the Perfect Dutch Braid Updo
Elevate your formal look with a Dutch braid updo
A Dutch braid updo combines the classic charm of loose Dutch braids with the elegance of an updo. It’s a versatile choice for formal events such as weddings, proms, or any special occasion where you want to look your best. Here’s how to create the perfect Dutch braid updo:
- Begin with clean and dry hair.
- Part your hair where you want the Dutch braid to start, whether it’s at the center or the side.
- Create a Dutch braid on one side by crossing the strands under each other while adding small sections of hair.
- Continue braiding along the scalp until you reach the nape of your neck.
- Secure the end of the braid with an elastic band.
- Repeat the process on the other side to create a second Dutch braid.
- Gather the remaining loose hair at the nape of your neck and create a low bun or chignon.
- Secure the bun with bobby pins or hairpins.
- Wrap the Dutch braid around the base of the bun and secure it with pins.
- Finish with a light mist of hairspray to set the style in place.
Bridal updos featuring Dutch braids
Dutch braid updos are a popular choice for brides. They offer a romantic and timeless look that complements a variety of wedding styles, from bohemian to classic. To enhance your bridal Dutch braid updo, consider incorporating delicate hairpins, a floral crown, or a veil that complements your wedding gown.
Tips for achieving a flawless updo that lasts all day
For a Dutch braid updo that looks stunning from the beginning of the ceremony to the final dance, follow these tips:
- Trial Run: Do a trial run of your updo before the big day to ensure it’s exactly as you envision it.
- Secure Foundation: Use bobby pins and hairpins strategically to secure the braids and bun in place. Consider a light-hold hairspray to set the style.
- Prep and Protect: Use hair products that provide hold without stiffness, and consider a heat protectant if you plan to use hot styling tools.
A Dutch braid updo is a sophisticated choice that adds an extra touch of elegance to any formal occasion. It’s a hairstyle that you can wear with confidence, knowing you look your absolute best.
Side Dutch Braid Bun: Effortless Elegance
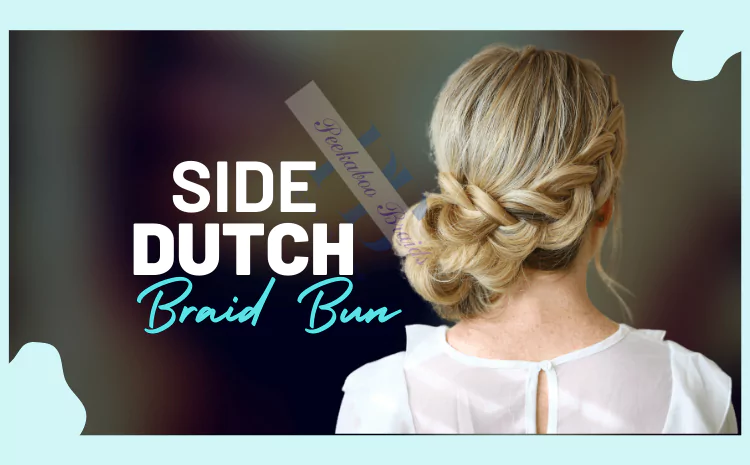
How to create a side Dutch braid for any occasion?
The side Dutch braid offers an effortlessly elegant look that can be dressed up or down for various occasions. It’s a versatile style that can be achieved in just a few steps. Here’s how to create a side Dutch braid:
- Begin with clean and detangled hair.
- Part your hair on one side, creating a deep part for a more dramatic effect.
- Starting on the side with more hair, take a small section near the hairline and divide it into three strands.
- Begin your Dutch braid by crossing the right strand under the middle strand, and then cross the left strand under the middle strand.
- Continue braiding, adding small sections of hair to each strand as you go.
- Braid along the back of your head, angling the braid diagonally downward.
- Secure the end of the braid with a hair tie or elastic band.
- For added texture and volume, gently pull apart the sections of the braid to loosen it slightly.
Styling options for various face shapes
The side Dutch braid complements various face shapes and can be styled to enhance your unique features:
- Round Face: Create a side Dutch braid with volume at the crown to add height and elongate the face.
- Oval Face: A side Dutch braid pulled tight against the head can emphasize the balanced proportions of an oval face.
- Heart-Shaped Face: Allow some loose strands or wisps around the face to soften the look and frame your features.
Combining side Dutch braids with other hairstyles
Side Dutch braids can be combined with other hairstyles to create eye-catching looks:
- Half-Up, Half-Down: Pair a side Dutch braid with a half-up, half-down hairstyle for a romantic and boho-inspired appearance.
- Side Ponytail: Incorporate the side Dutch braid into a side ponytail for an effortlessly chic look that works for both casual and formal occasions.
The side Dutch braid is a versatile and timeless style that adds a touch of elegance to your appearance. Experiment with different variations and find the one that suits you best.
Exploring the Difference Between Dutch and French Braids
Understanding the distinctions between Dutch and French braids
Dutch and French Box braids are two classic braiding techniques that create unique looks. While they may appear similar at first glance, there are distinct differences that set them apart. Here’s a breakdown of the key differences:
Dutch Braid
- Also known as an inside-out or inverted braid.
- Created by crossing the strands under each other.
- Adds a three-dimensional effect, appearing raised from the scalp.
- Works well for various hairstyles, including updos and pigtails.
French Braid
- Created by crossing the strands over each other.
- Lies flat against the scalp, appearing as if it’s woven into the hair.
- Offers a polished and sleek look, ideal for elegant hairstyles.
When to choose Dutch or French braids?
Understanding the differences between these two braiding techniques allows you to choose the one that best suits your desired look. Dutch braids are perfect for adding dimension and texture to your hairstyle, while French Knotless braids offer a more refined and classic appearance. Experiment with both styles to see which one complements your personal style and the occasion you have in mind.
Embrace the Beauty of Half Dutch Braids
Achieving a trendy half Dutch braid style
Half Dutch braids are a stylish and versatile choice that combines the elegance of Dutch braids with the freedom of leaving some hair down. This look is perfect for those who want a trendy and casual appearance. Here’s how to create half Dutch braids:
- Start with clean and dry hair.
- Part your hair down the middle or on one side, depending on your preference.
- Choose one side to begin your half Dutch braid.
- Take a small section of hair near the hairline and divide it into three strands.
- Begin your Dutch braid by crossing the right strand under the middle strand, and then cross the left strand under the middle strand.
- As you continue braiding, add small sections of hair to each strand, but only from the side you’re braiding.
- Braid along the side of your head, stopping at the nape of your neck or where you want to transition to loose hair.
- Secure the end of the braid with a hair tie or elastic band.
- Repeat the process on the other side if desired.
- Leave the rest of your hair down or style it as you like.
Styling options for half Dutch braids
Half Dutch braids offer versatility when it comes to styling:
- Messy Waves: Leave your hair down and create loose, beachy waves for a carefree look.
- Ponytail: Gather the remaining loose hair into a ponytail for a sporty or polished appearance.
- Half-Up Bun: Create a half-up bun or top knot with the unbraided hair for a trendy and effortless style.
Half Dutch braids are a trendy and fashionable choice for any occasion. They allow you to showcase your braiding skills while keeping your look fresh and modern.
Achieving the Perfect High Ponytail with Two Dutch Braids
Elevate your ponytail game with Dutch braids
A high ponytail with Dutch braids is a chic and stylish choice that adds flair to a classic hairstyle. It’s perfect for those days when you want a polished look without sacrificing comfort. Here’s how to achieve the perfect high ponytail with Dutch braids:
- Start with clean and dry hair.
- Begin by creating a Dutch braid on one side of your hair. You can choose the side based on your preference.
- Take a small section of hair near the hairline and divide it into three strands.
- Start your Dutch braid by crossing the right strand under the middle strand, and then cross the left strand under the middle strand.
- As you continue braiding, add small sections of hair to each strand, but only from the side you’re braiding.
- Braid along the side of your head, angling the braid diagonally upward toward the crown of your head.
- Secure the end of the braid with a hair tie or elastic band.
- Repeat the process on the other side to create a second Dutch braid.
- Gather the rest of your loose hair and the two braids, pulling them all into a high ponytail at the crown of your head.
- Secure the ponytail with a hair tie or elastic band.
- Use a small strand of hair from the ponytail to wrap around the base and conceal the hair tie for a polished finish.
Adding volume and texture to your high ponytail
To achieve a high ponytail with maximum volume and texture:
- Tease the hair at the crown of your head before gathering it into the ponytail.
- Use a texturizing spray to add grip and dimension to your hair.
- Gently pull apart the sections of the Dutch braids to create a fuller and more textured look.
A high ponytail with Dutch braids is a sophisticated and versatile hairstyle that works for both casual and formal occasions. It’s a chic way to keep your hair out of your face while making a statement with your style.
Dutch Braids for Wet Hair: A Stylish Solution
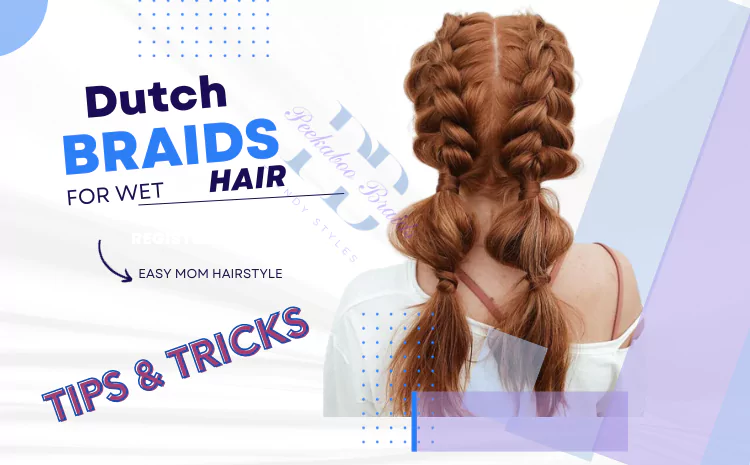
Styling wet hair with Dutch braids for a unique look
Braiding wet hair offers a unique and stylish alternative to traditional dry hair braiding. Wet hair is more pliable and can result in a sleek and polished appearance. Here’s how to create Dutch braids for wet hair:
- Start with freshly washed and towel-dried hair.
- Comb through your hair to remove any knots or tangles.
- Divide your hair into two equal sections, creating a part down the middle.
- On one side, begin your Dutch braid by taking a small section of wet hair near the hairline and dividing it into three strands.
- Cross the right strand under the middle strand, and then cross the left strand under the middle strand to initiate the braid.
- Continue braiding, adding small sections of wet hair to each strand as you go.
- Braid along the scalp until you reach the nape of your neck or your desired endpoint.
- Secure the end of the braid with a hair tie or elastic band.
- Repeat the process on the other side to create a second Dutch braid.
Why wet hair braiding works?
Braiding wet hair offers several benefits:
- Wet hair is more pliable, making it easier to manipulate and create tight, sleek braids.
- The moisture in wet hair helps prevent flyaways and frizz, resulting in a smoother finish.
- Wet hair braids can be left to air dry, setting the style in place as they dry.
Styling options for wet hair Dutch braids
Once you’ve created Dutch braids on wet hair, you can choose how to style them:
- Leave the braids to air dry for a sleek and polished look.
- Blow-dry the braids for added volume and texture.
- Transition the wet hair braids into a bun or updo for a formal appearance.
Wet hair Dutch braids are a stylish solution for when you want to achieve a smooth and controlled look with your braids. They’re perfect for those who prefer a sleek finish or are looking for a unique way to style their wet hair.
Art of Braiding Your Own Hair: Tips and Techniques
Mastering the art of self-braiding
Braiding your own hair can be a challenging yet rewarding skill to master. Whether you’re practicing for everyday styles or special occasions, these tips and techniques can help you become proficient in self-braiding:
- Use a mirror: Position a mirror in front of you and a second mirror behind you to get a clear view of your hair from all angles.
- Start with simple styles: Begin with basic braiding styles like a three-strand braid or a simple Dutch braid to build your confidence.
- Practice regularly: Like any skill, self-braiding improves with practice. Dedicate time to experimenting with different braiding techniques.
- Invest in good tools: Quality hair ties, hairpins, and a comb are essential for successful self-braiding.
- Seek tutorials and guidance: There are countless online tutorials and guides that provide step-by-step instructions for self-braiding. These can be invaluable resources as you learn.
- Be patient: Self-braiding can be frustrating at first, but don’t give up. With patience and persistence, you’ll improve over time.
Maintaining Double Dutch Braids for All-Day Wear
Tips for keeping your Dutch braids looking great all day
Dutch braids can last all day with the right care and maintenance. Here are some tips to ensure your braids stay looking fresh and stylish:
- Secure with quality hair ties: Use hair ties that provide a secure hold without pulling or damaging your hair.
- Apply hairspray or texturizing spray: Lightly spritz your braids with hairspray or texturizing spray to set the style in place and prevent frizz.
- Avoid excessive touching: Try not to constantly touch or adjust your braids throughout the day, as this can cause them to loosen or lose their shape.
- Use hairpins if needed: If you have any loose sections or flyaways, use hairpins to secure them discreetly.
- Refresh with dry shampoo: If your hair tends to get oily, use dry shampoo to refresh your scalp and maintain the braids’ volume.
- Protect while sleeping: If you want to preserve your braids overnight, sleep with a silk or satin pillowcase and loosely wrap your braids in a silk scarf.
By following these tips, you can ensure that your Dutch braids look great from morning to night, no matter the occasion.
Dutch Braids: The Versatile Choice for All Hair Types
Celebrating the versatility of Dutch braids
One of the remarkable aspects of Dutch side braids is their versatility. They can be adapted to suit a wide range of hair types, lengths, and styles. Whether you have long, short, straight, curly, or textured hair, Dutch crown braids offer endless possibilities for creativity and self-expression. The key is to embrace your unique hair characteristics and explore how Dutch boxer braids can enhance your natural beauty.
Dutch braids are not limited by age or occasion either. They can be styled to suit school, work, weddings, parties, and everyday life. With a little practice and experimentation, you can become a Dutch braiding expert and enjoy the beauty and charm of this timeless hairstyle.
Conclusion
Dutch braids are more than just a hairstyle; they’re a form of self-expression and a canvas for creativity. From classic styles like pigtails to sophisticated updos and trendy half braids, Dutch box braids offer something for everyone. Whether you’re a braiding novice or a seasoned pro, the world of Dutch braids is yours to explore. So, grab your hair ties and start braiding your way to stylish and stunning hair.

Hi there! I’m M.Afzal, a passionate and experienced hair stylist with a love for creating unique and trendsetting looks. With years of expertise in the industry, I’m dedicated to sharing top-notch advice and inspiring ideas to elevate your hairstyle game. Join me on this journey of beauty and self-expression as we explore the captivating world of peekaboo braids and much more!